Power Platform ToolBox
Contact Center Map
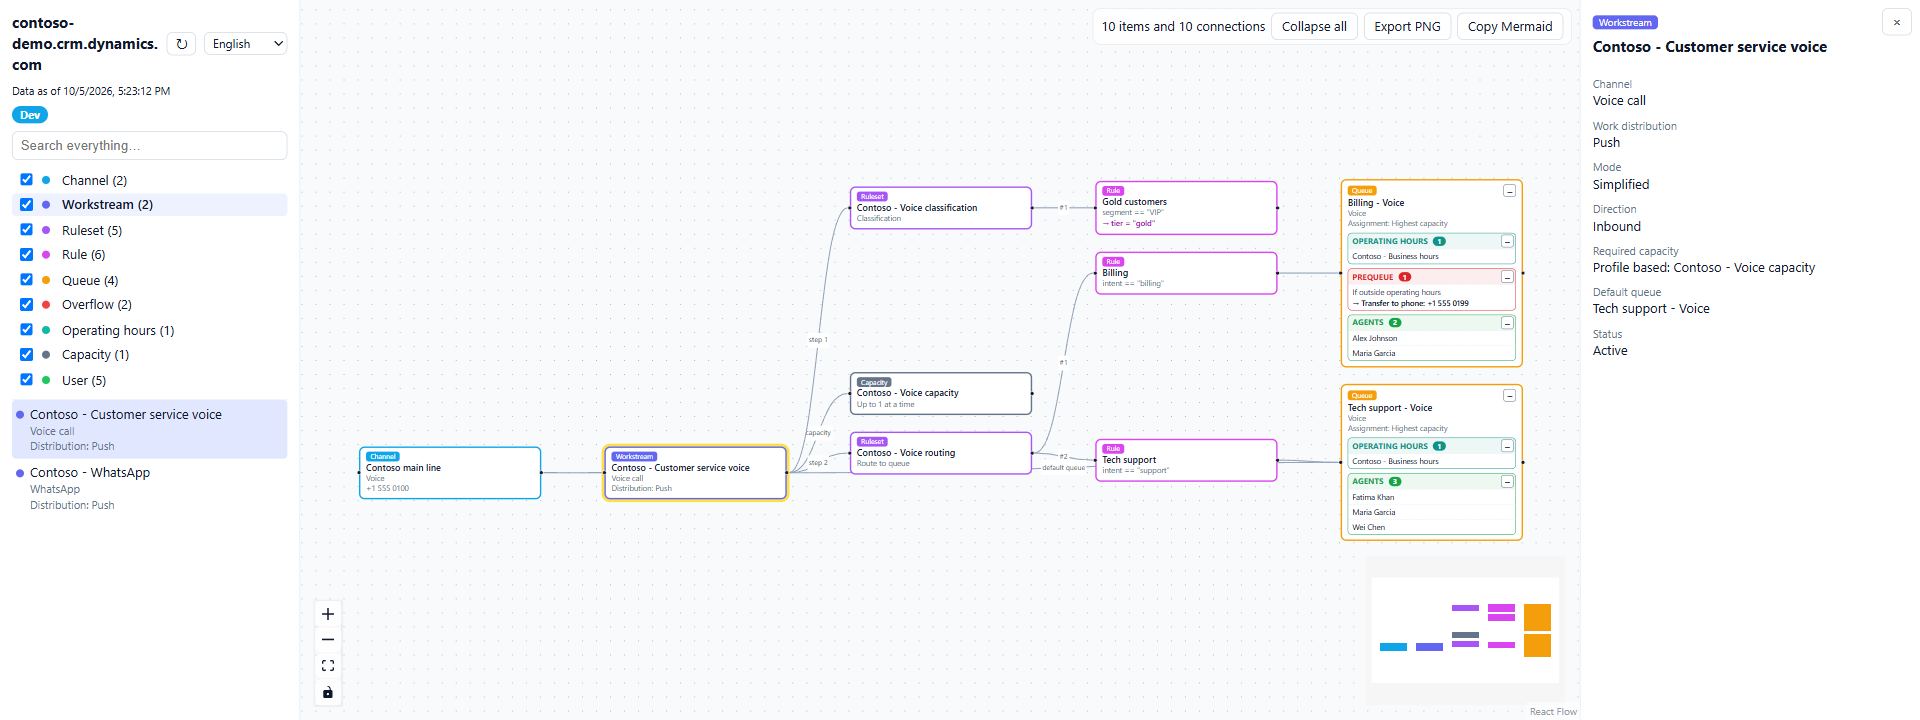
Draws your Dynamics 365 Contact Center setup (channels, workstreams, routing rules, queues, overflow, operating hours and agents) and lets you edit it safely.
Understanding how a Contact Center environment routes a conversation usually means clicking through a dozen screens in the admin center. Contact Center Map draws it in one picture.
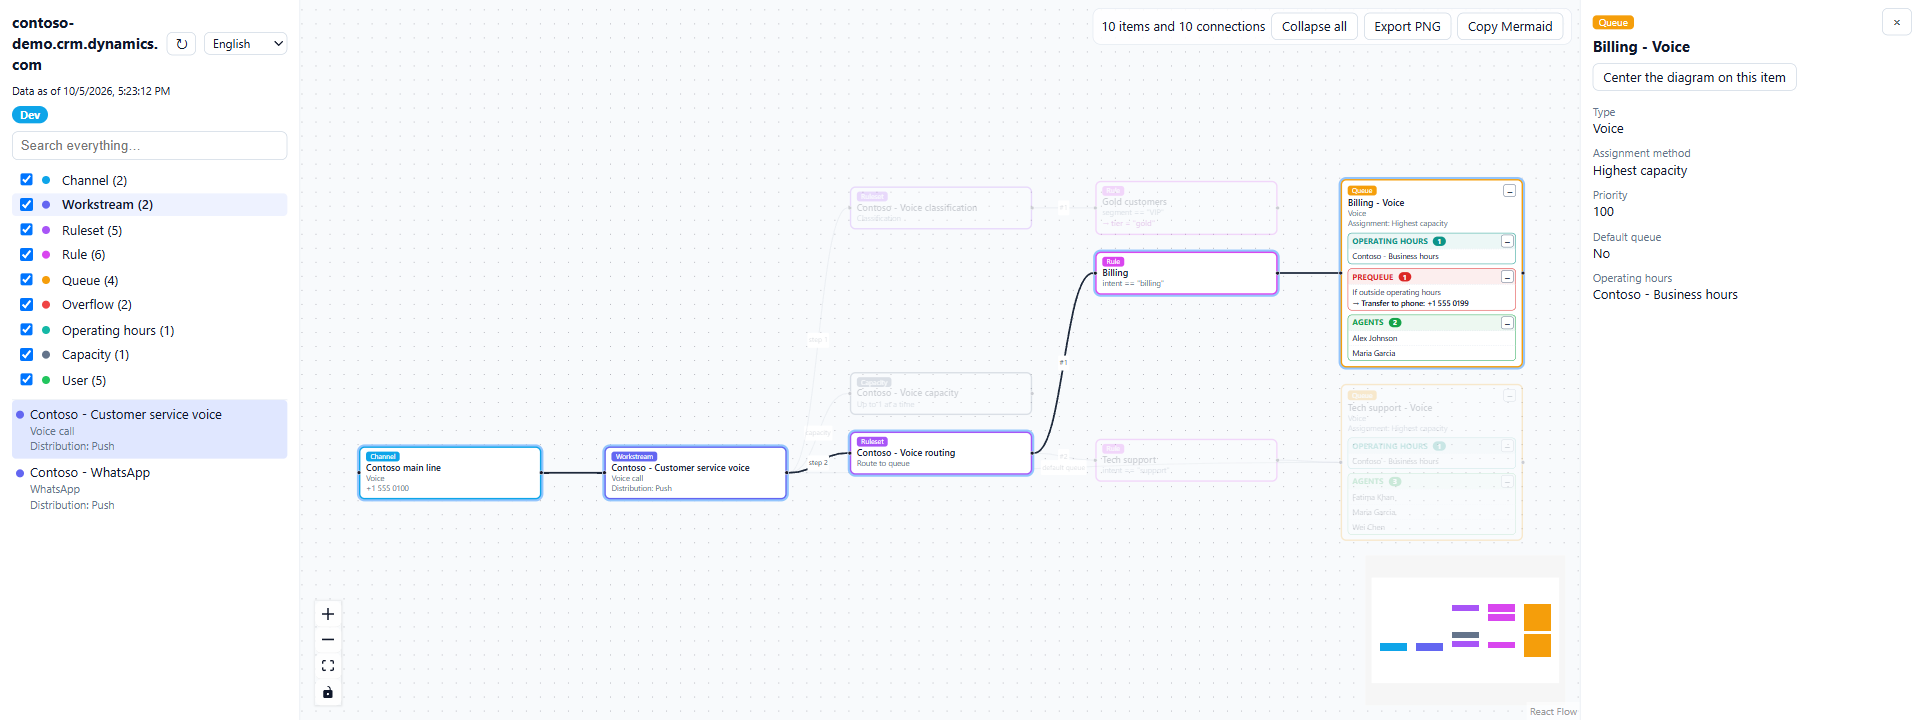
Pick a workstream, queue, rule or user and you get the whole path: channel → workstream → routing rulesets → rules → queues. Each queue has its own card with its operating hours, PreQueue and InQueue overflow and agents.
What it does
- Shows channels (voice with phone number, WhatsApp, chat, Teams, SMS…), bots and capacity profiles for each workstream.
- Turns routing rules into readable sentences, like
If outside operating hours → Transfer to phone: +1 555 0100. - Resolves overflow actions to their target queue or phone number.
- One click on a card highlights the path that leads to it.
- Export to PNG for documents and copy as Mermaid for wikis.
- Light and dark theme, in six languages.
Edit mode
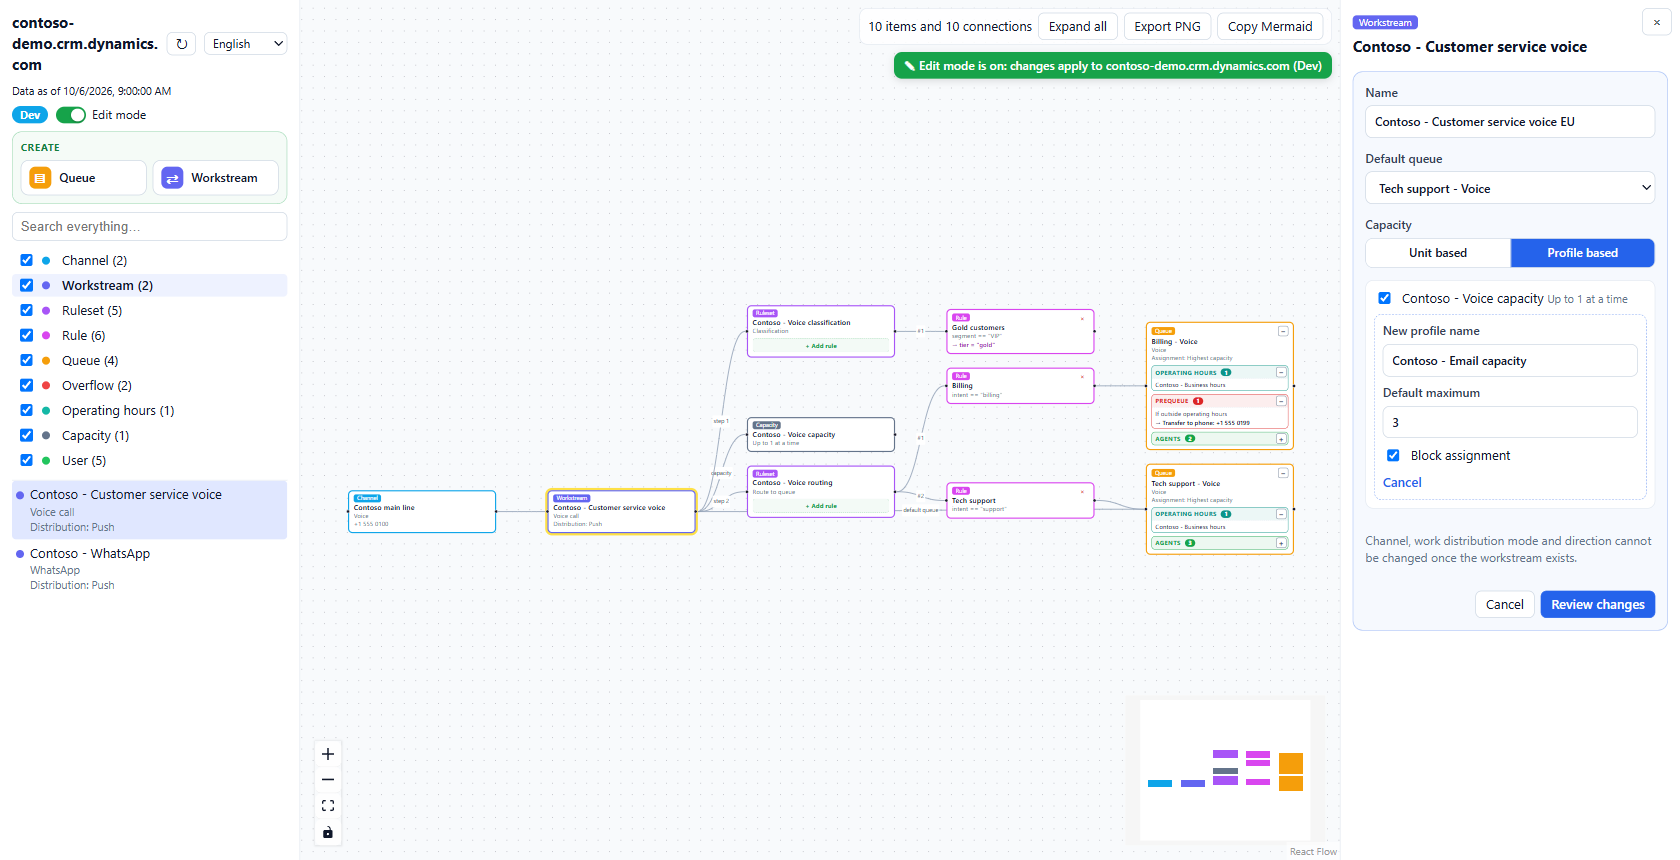
Off by default. When you turn it on you can add or remove agents, create queues, copy a workstream, add or delete routing rules, edit workstreams, queues and capacity profiles, and edit how a workstream identifies the customer, something the admin center has no screen for.
Nothing is saved until you confirm: every change shows a preview with the environment (with an extra warning for Production) and can be undone right after.
How to use it
- Install Power Platform ToolBox and connect to your environment.
- Add Contact Center Map from the tool catalogue and open it.
- Choose a workstream, queue, rule or user from the list.
The map only needs read access to the Omnichannel configuration tables. Credentials never reach the tool: every request goes through the ToolBox connection.